Recording & Editing
Recording and editing on your Spirio | r is simple and intuitive. Follow these easy instructions below to begin!
Recording on Spirio | r
STEP ONE — Enter Record Mode
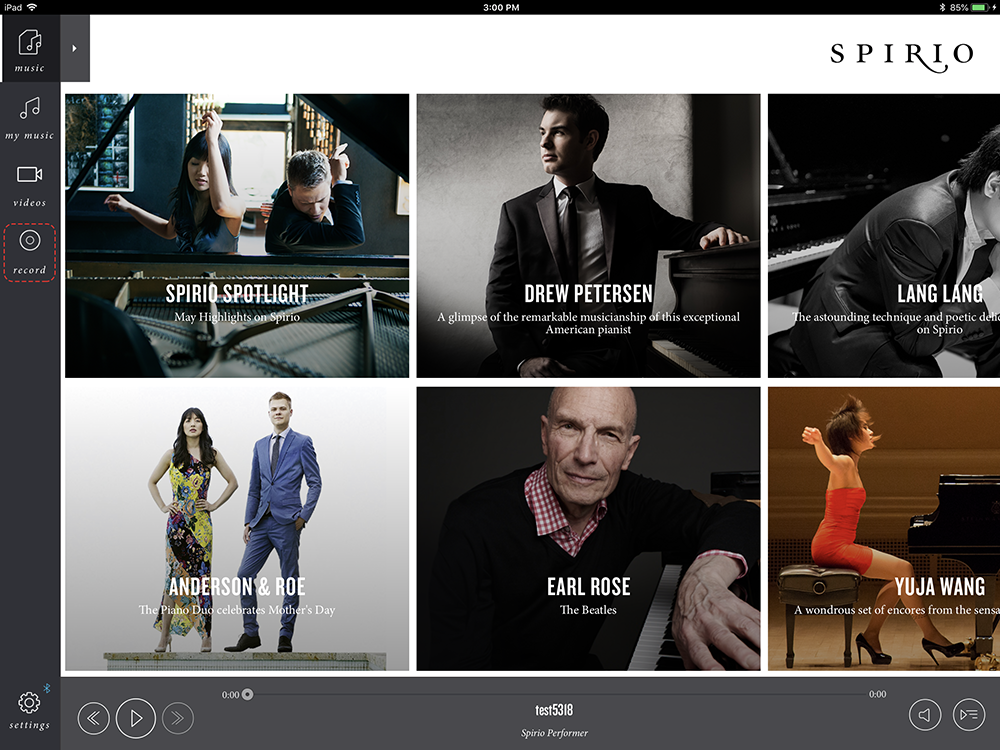
- Tap Record from the left side of your Spirio app.
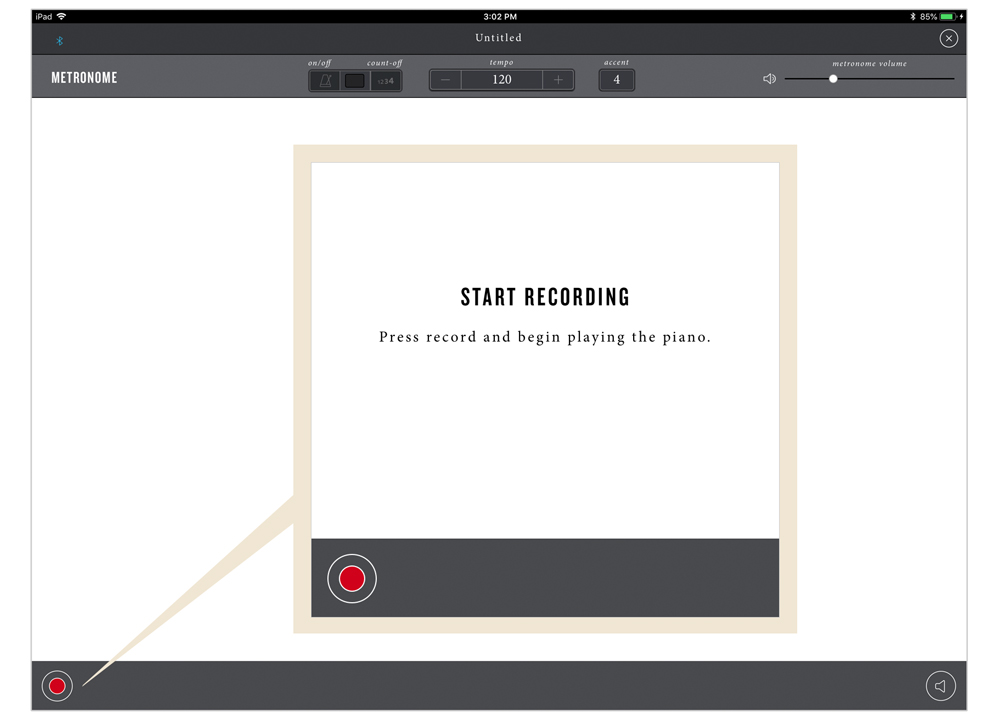
STEP TWO — Prepare to Record
- Your Spirio | r is ready to record. Simply tap on the red record button on the lower left side to begin.
- Your Spirio will record what you play.
 STEP THREE — Save your recording
- When finished, tap the Stop button on the lower left corner.
- You will be prompted to either save your recording, or to discard it.
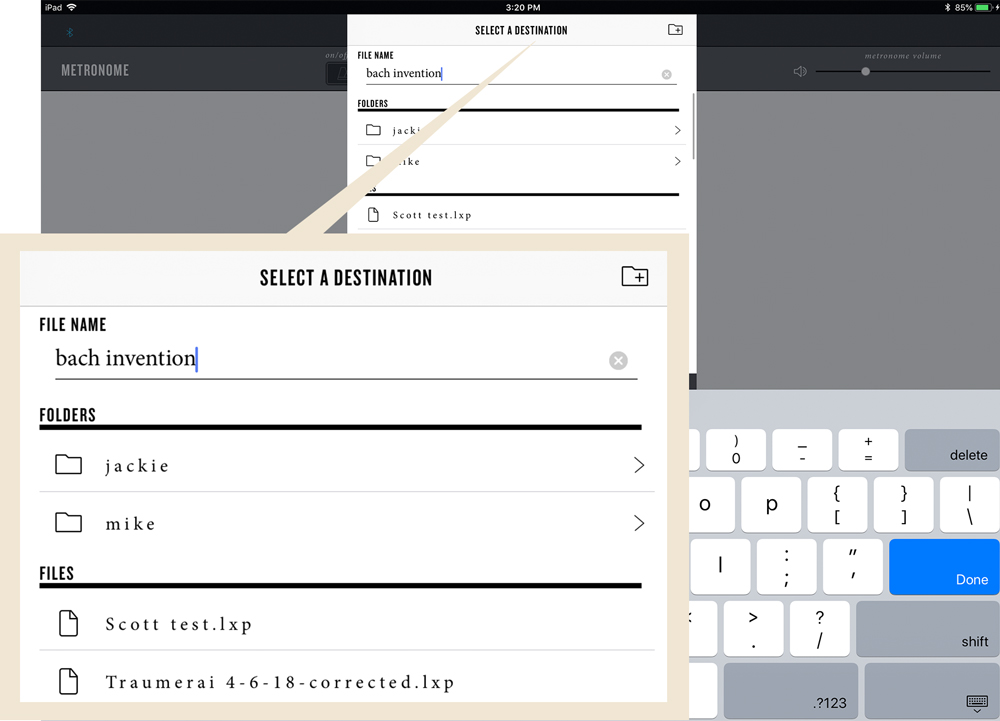
STEP FOUR — Name your recording
- Type in a title for your recording.
- If you wish to create a folder, tap the + icon on the top right corner.
- Tap Done on the iPad keyboard.

STEP FIVE — Start a new recording or edit.
- You can either start a new recording, or edit the recording you just made.
File Storage
How to find your recordings on Spirio | r
STEP ONE — Find your recordings
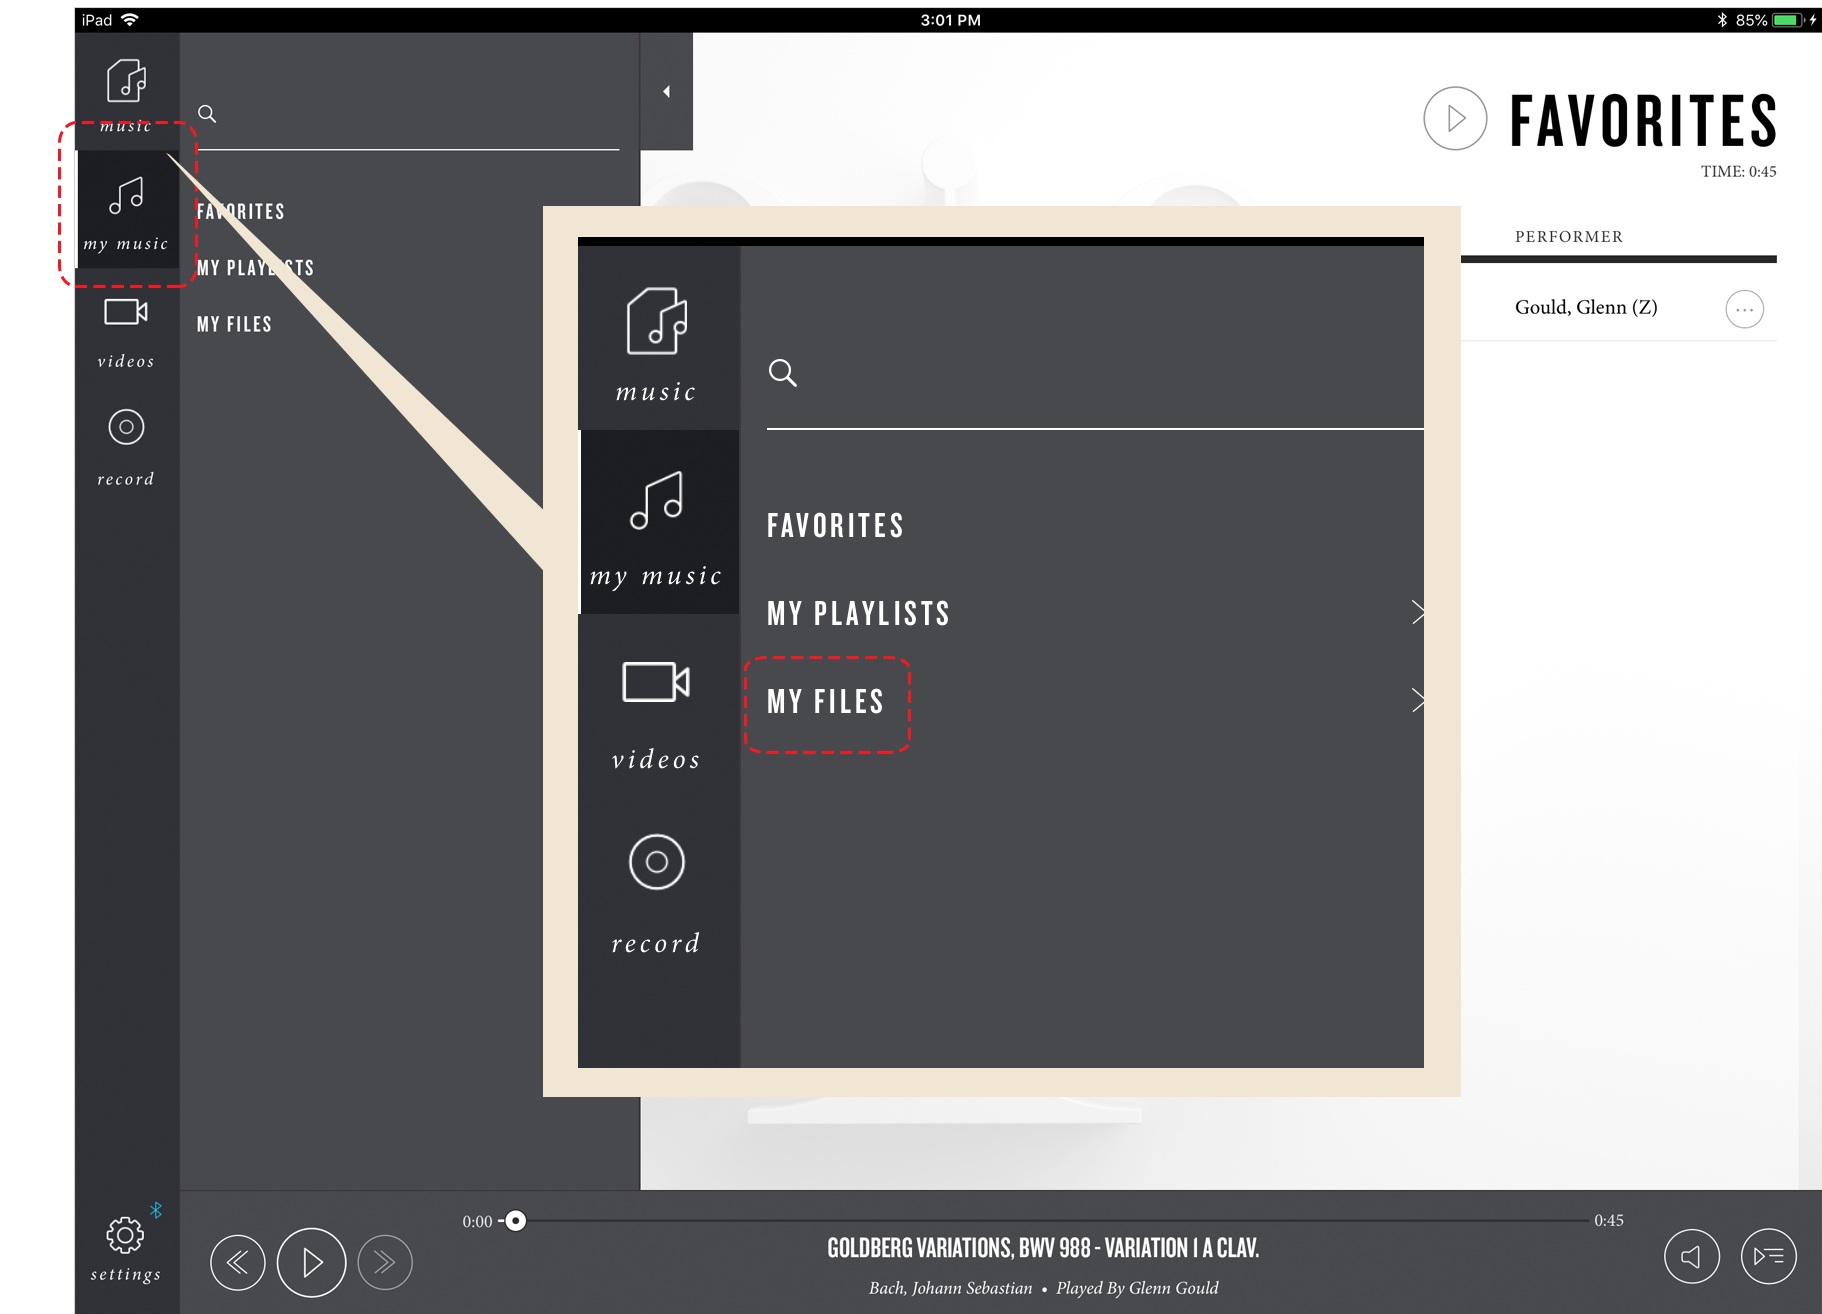
- Tap on “My Music” from the home screen
- Next, tap on “My Files” from the menu.

STEP TWO — Locating your files
- Your Spirio | r has a hard drive where your recordings can be stored.
- You can also store files on a USB thumbdrive which can be plugged directly into your Spirio.
How To Edit A Recording
The Spirio Editor is simple to use. However, this is a powerful, high-resolution piano editing tool unlike anything else. Below are simple instructions for editing your recordings. For a more comprehensive overview of editor features, open the Spirio app, connect to a Spirio|r piano, open Settings > Help > Record/Edit.
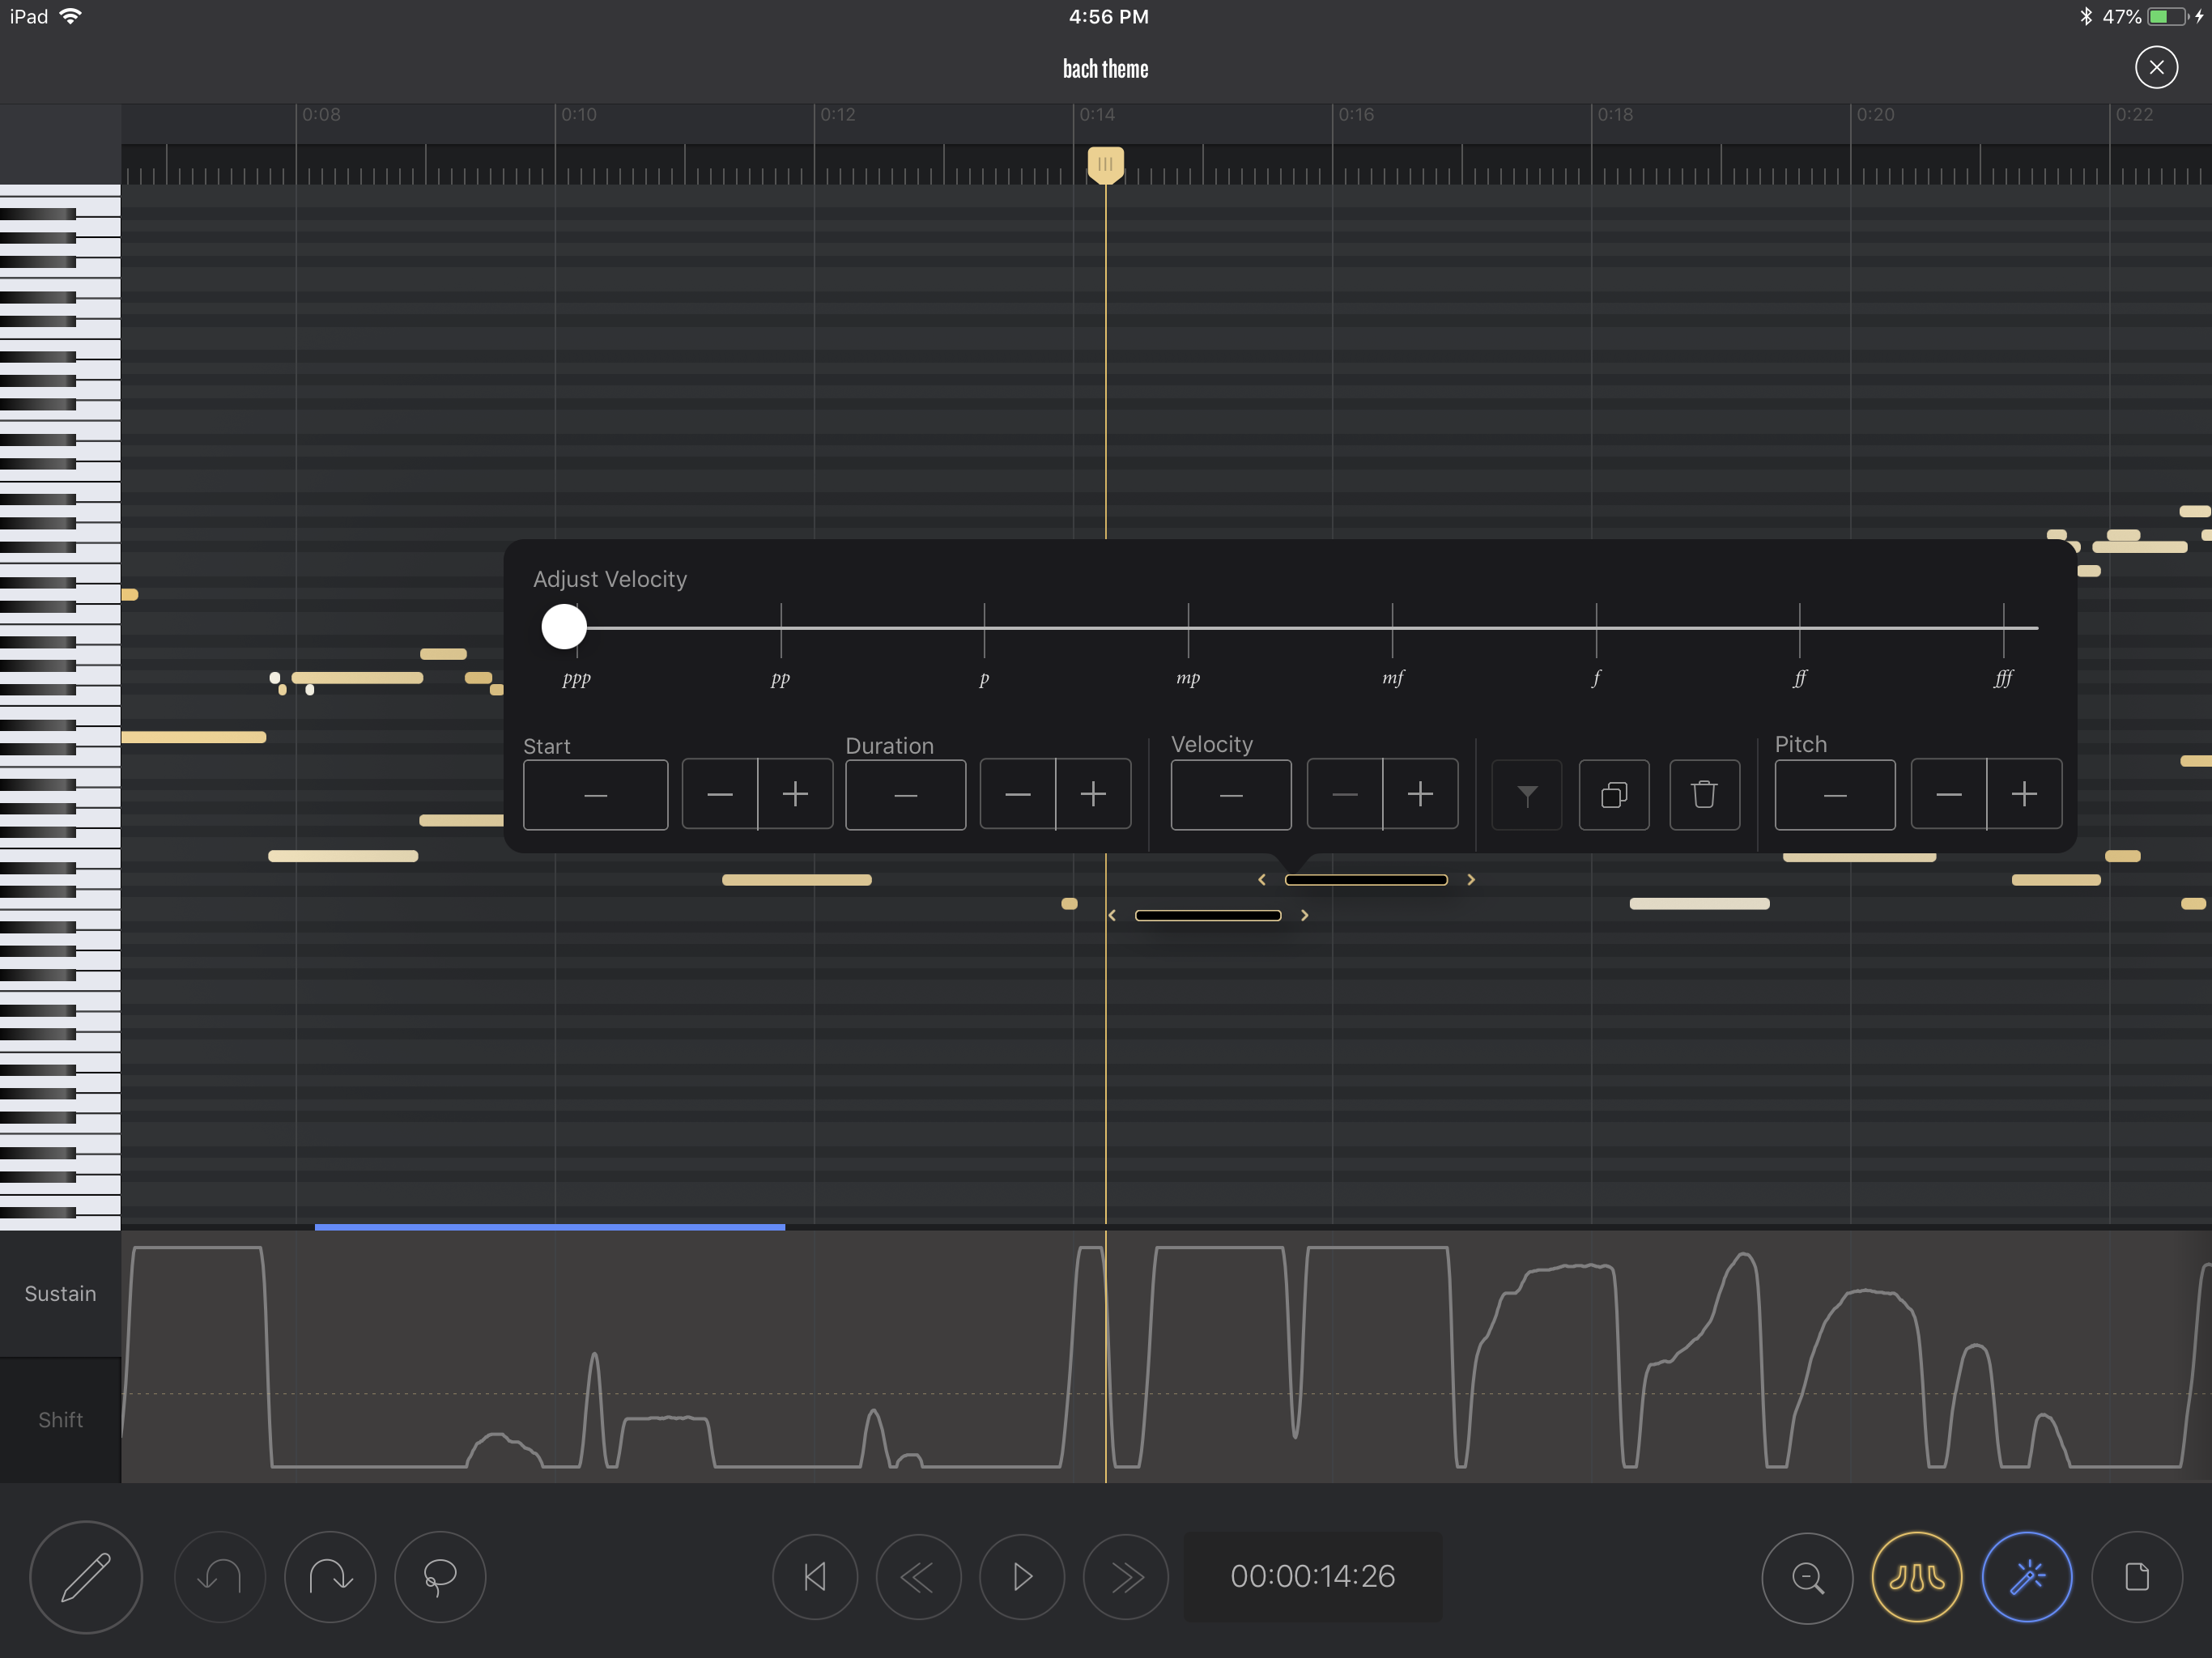
EDITOR OVERVIEW:
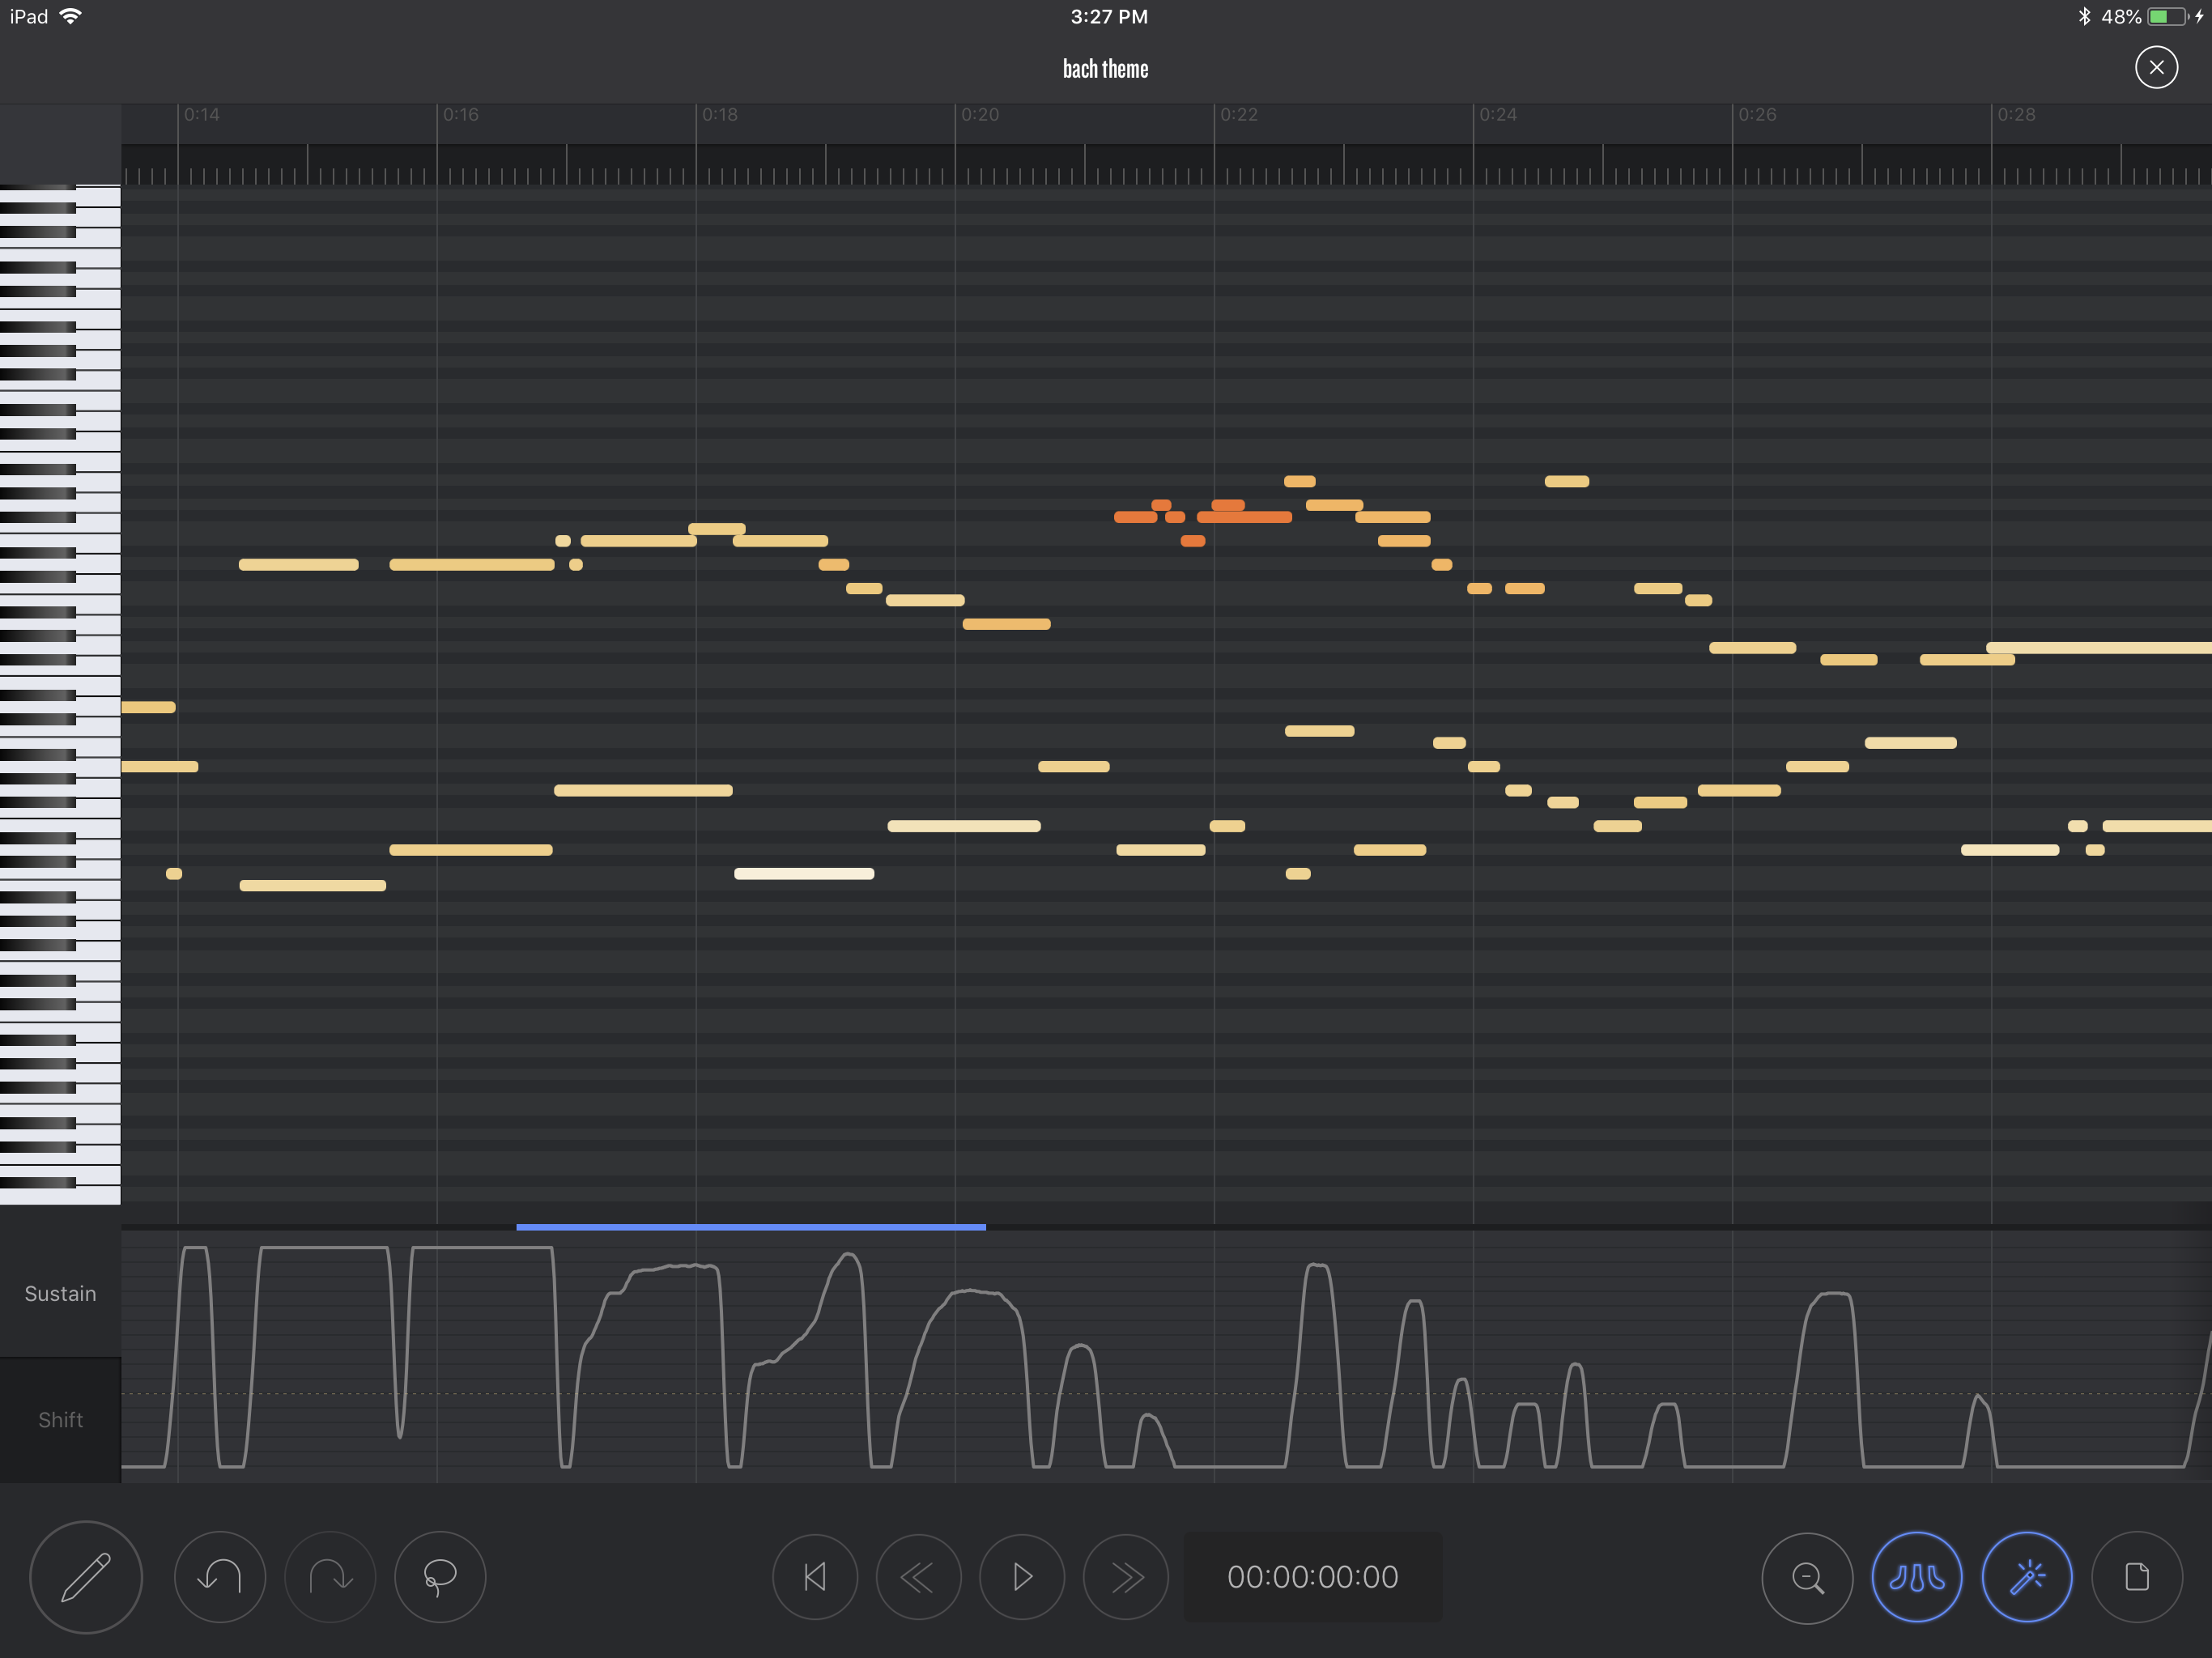
- Your Spirio recording is presented in a “piano roll” format.
- Each note is displayed on a grid, and corresponds to the note on the reference keyboard located on the left side of your editor.
- To zoom in, pinch in with two fingers.
- To zoom out, either pinch out with two fingers, or press the magnifying glass on the bottom right to zoom out to 100%.
STEP ONE — Edit your recording
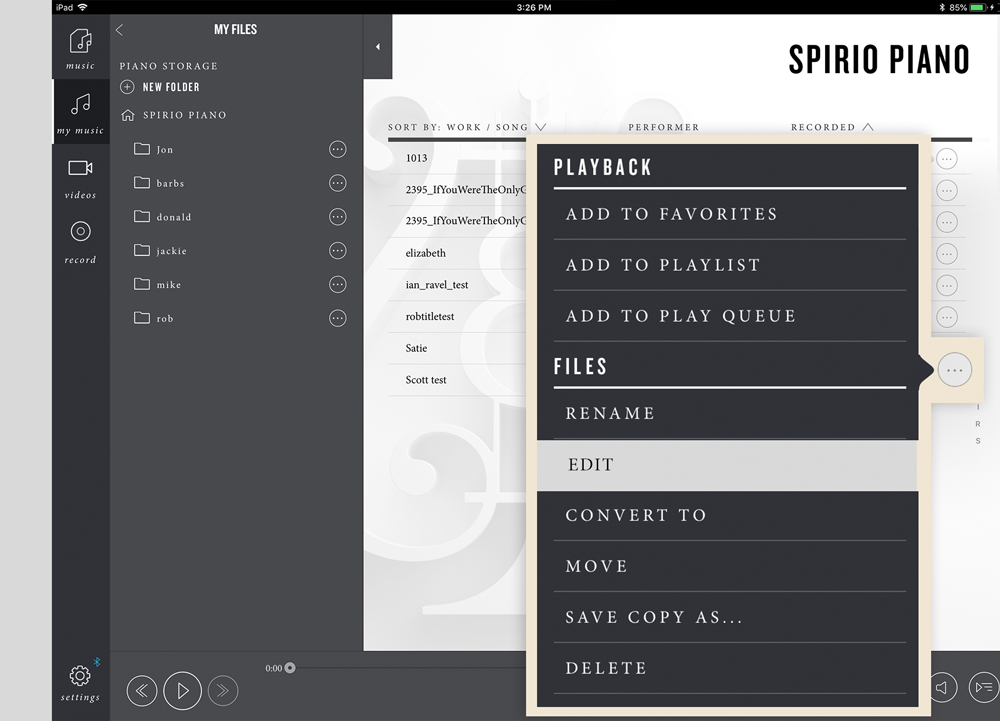
- To edit a recording, navigate to “My Files” and tap the more button (...) located on the far right side of the file you would like to edit.
- From the menu of choices, tap “Edit”.
STEP TWO — Loud/Soft Heat Map
- Every note has its own color, corresponding to how loud or soft it was recorded.
- The loudest notes are red.
- The softest notes are white.
 STEP THREE — Editing a note’s volume
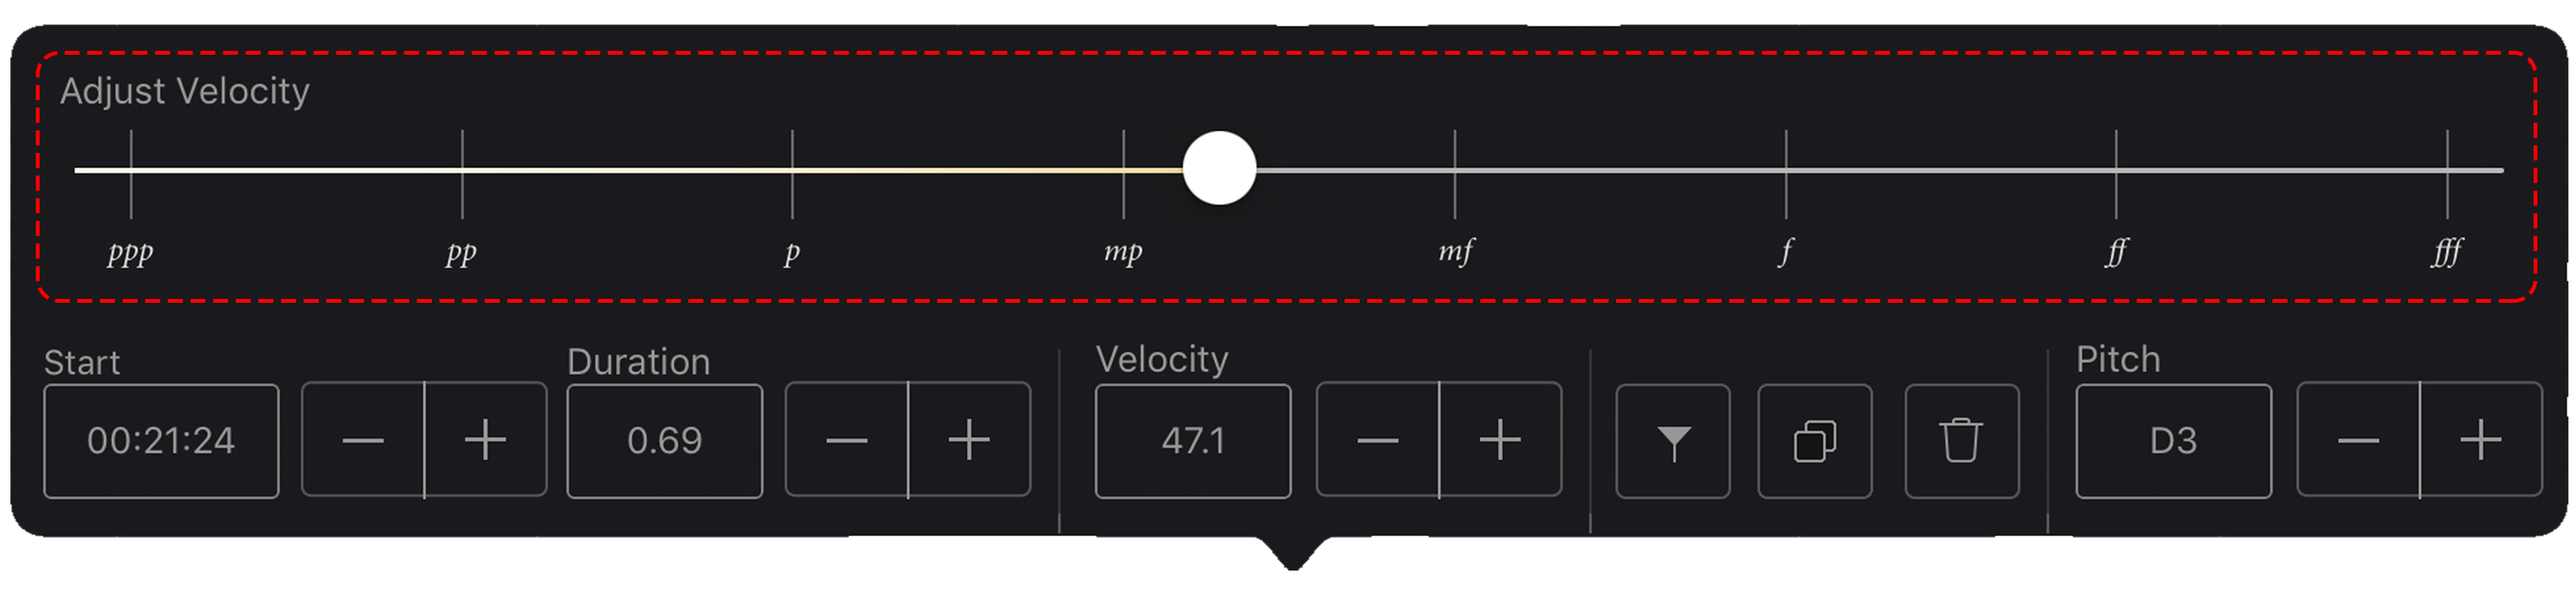
- Tap on any note and a pop up will appear.
- To edit the note velocity, (volume of the note), drag the slider, or enter a specific percentage from 1 (soft) to 100% (loud).
 STEP FOUR — Editing a note’s duration
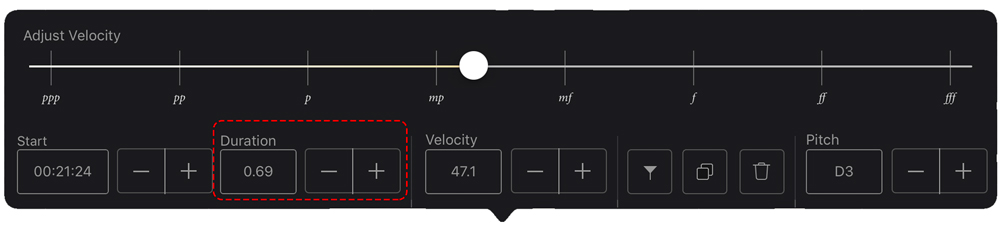
- You can make notes longer or shorter by tapping the - + buttons, or entering a specific time value
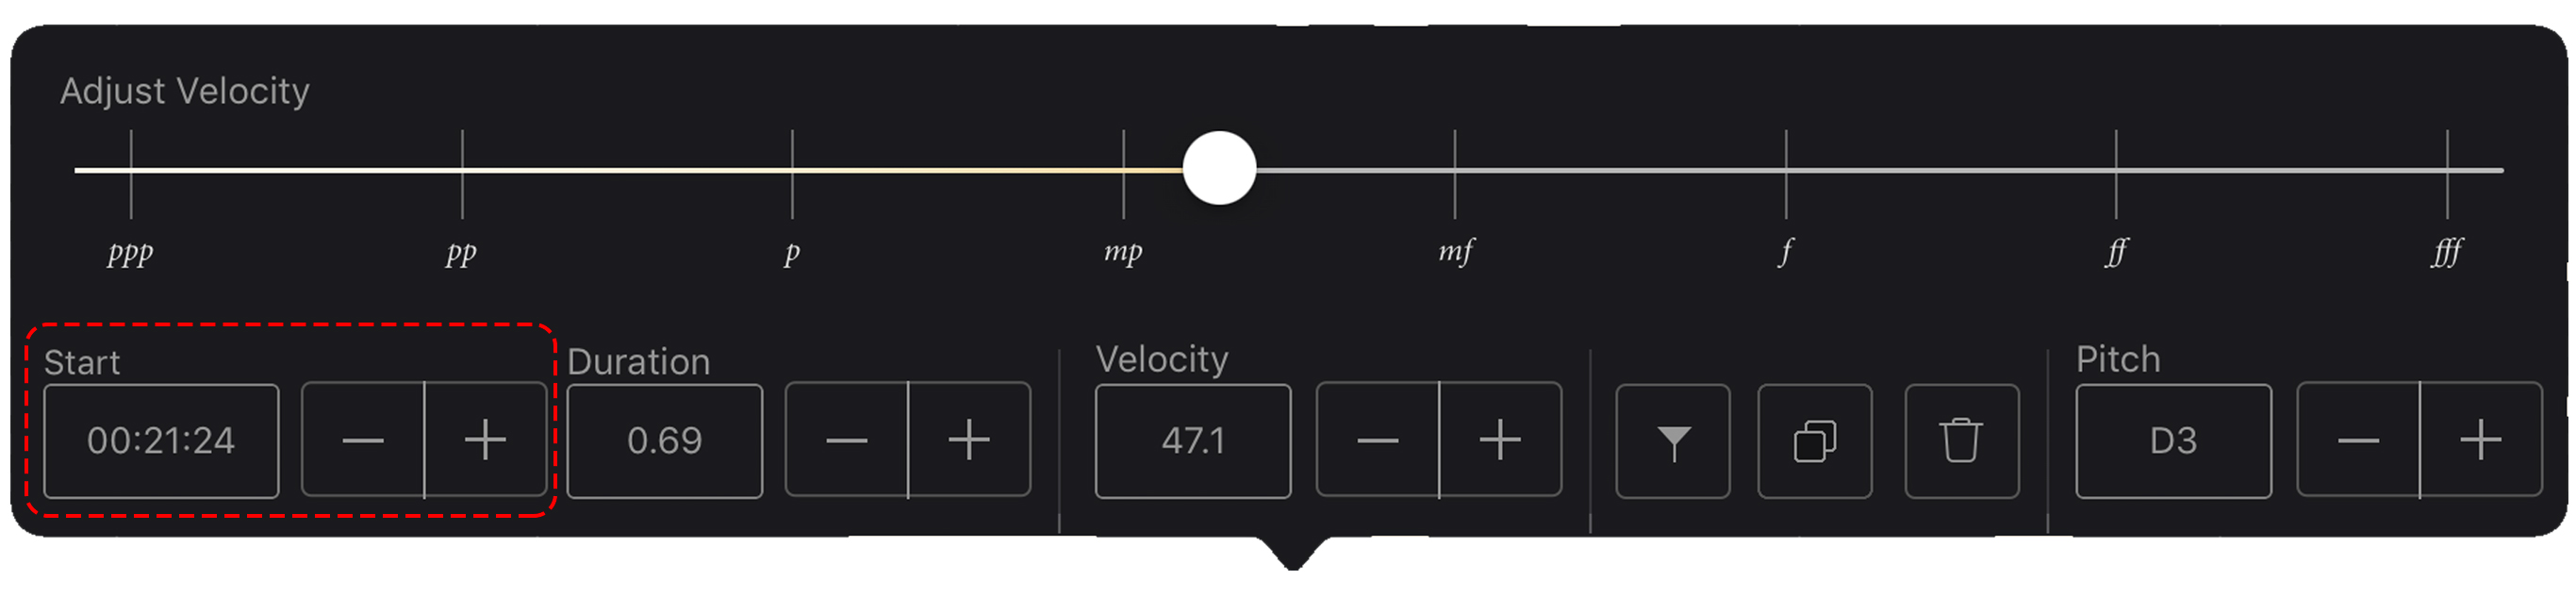 STEP FIVE — Editing a note’s start time
- You can modify the start time to a specific value by entering it into the “Start” box.
 STEP SIX — Editing the pitch of a note
- To edit a note’s pitch tap the - + buttons, or enter a specific note name/location.
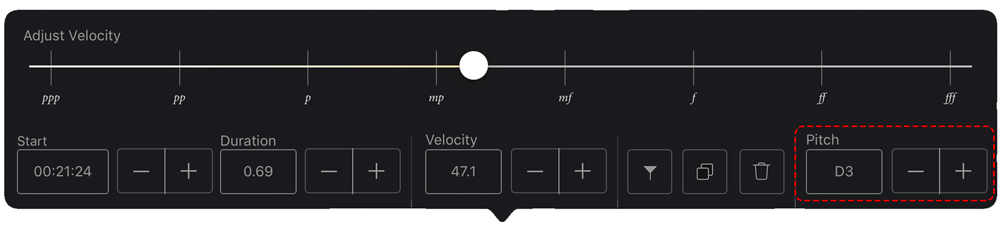
 STEP SEVEN — Deleting a note
- Tap the trash can to delete the note.
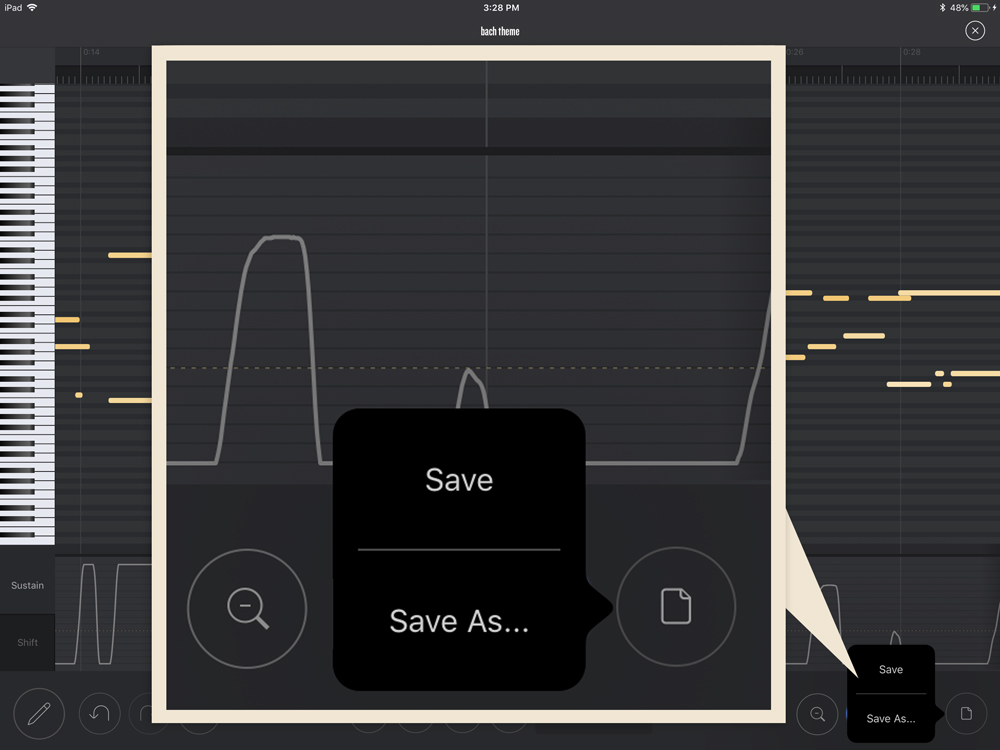 STEP EIGHT — Saving
- To save your file: Tap the Save button on the bottom right and choose “Save”.
- To save your file with a different name: Tap the Save button and choose “Save As” to give your file a different name.
Advanced Editing Techniques
The Spirio Editor is capable of making very powerful changes to your recording. Below are additional instructions for using advanced Spirio editing features.
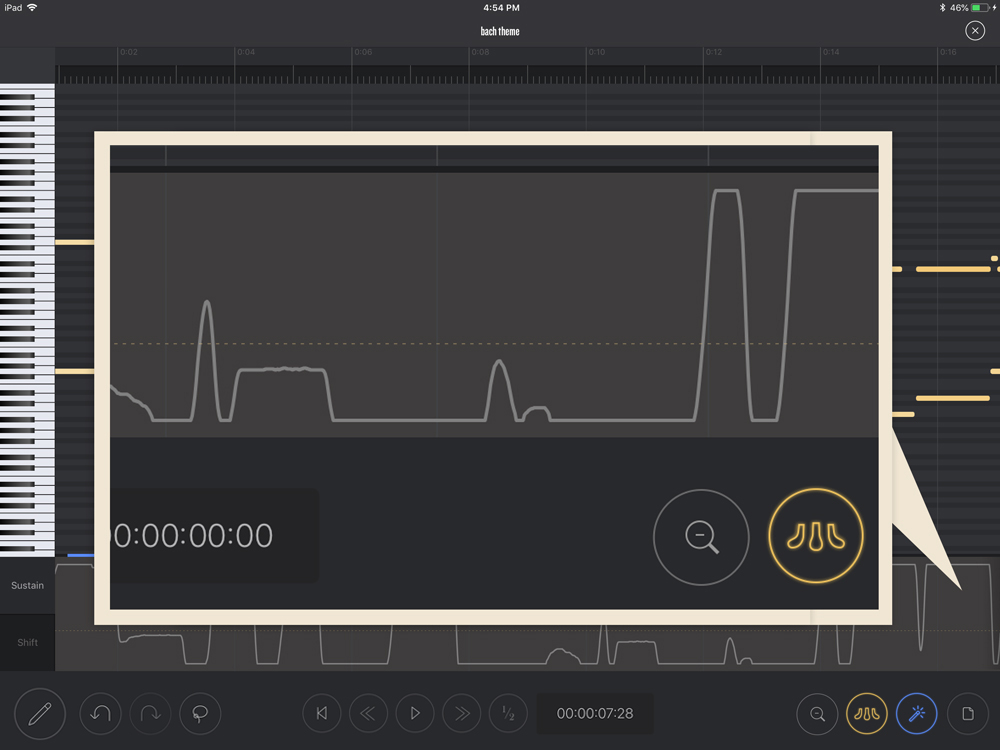 Adjusting the sustain pedal:
It is simple to make fine changes to the sustain pedal:
- Tap the pedal button on the bottom right.
- The pedal curve field will turn light grey, enabling changes to be made to the pedal data.
- Drag the pedal curve from bottom (off) to top (fully engaged), or somewhere in between.
- The pedal contact point is indicated by the ----- (dotted) line.

The lasso tool:
You can select a group of notes by using the lasso tool:
- Tap the lasso tool from the bottom left.
- Drag a line around the notes you wish to select.
- You can now make global changes to volume, pitch, or the time/duration for the selected notes.
- Use the lasso tool to delete a group of notes.
Snap notes to grid:
Use the snap to grid button to align a group of notes to a specific time value:
- Place the playhead at the desired time value, by tapping on the time grid at the top of the editor.
- Next, lasso the notes you wish to move.
- In the pop up menu, tap the "snap to grid" button and the notes will automatically move to the playhead location.
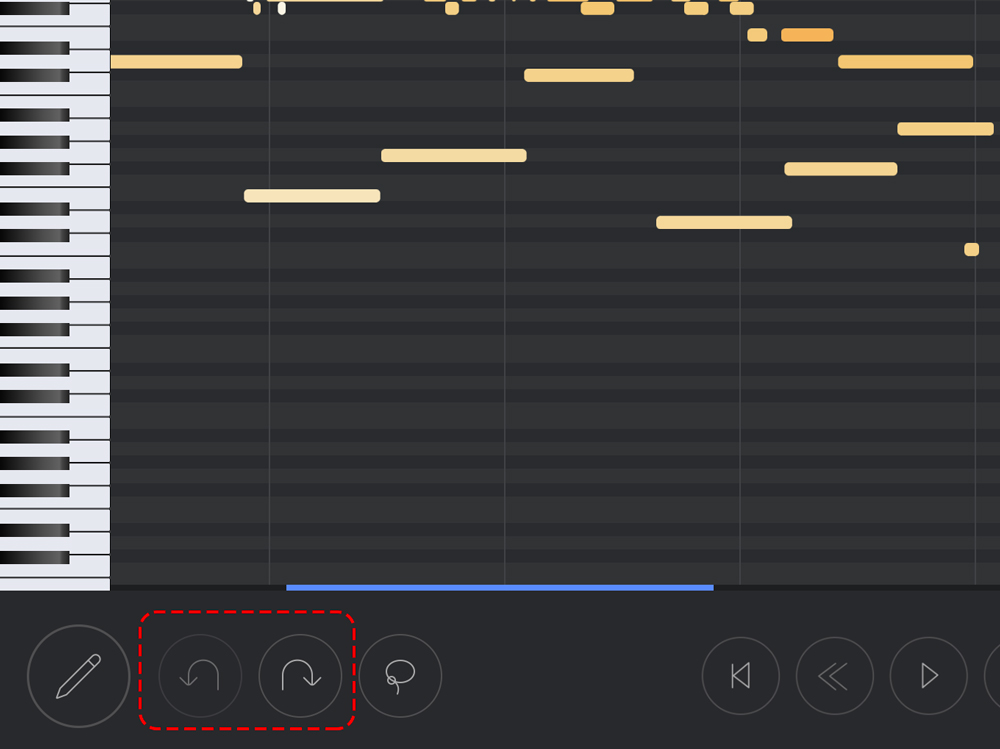
Undo/Redo:
Tap the undo/redo buttons on the lower left to undo or redo your most recent changes.
Editing double strikes or brushed notes
Follow these simple instructions to edit double strikes and brushed notes

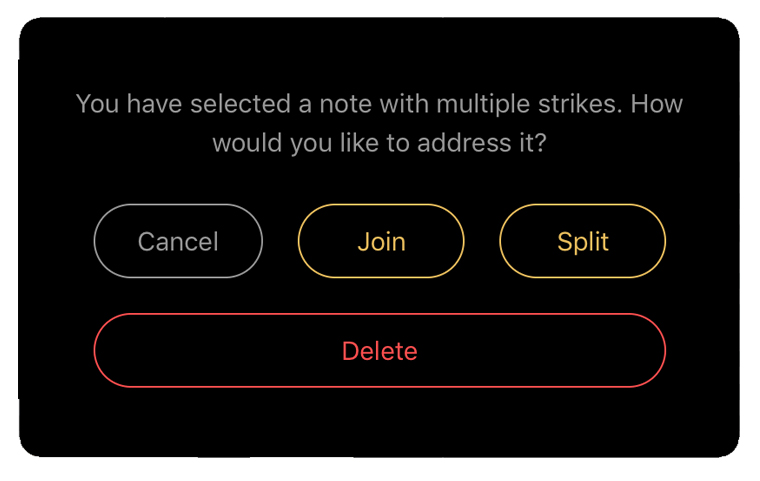
Editing double strikes:
Double strikes are displayed as two notes joined together.
To modify double strikes:
- Tap the joined note and a diaglog box appears.
- Tap join, to combine into one note.
- Tap split, to separate into two notes.
You can now edit the combined or separated notes.
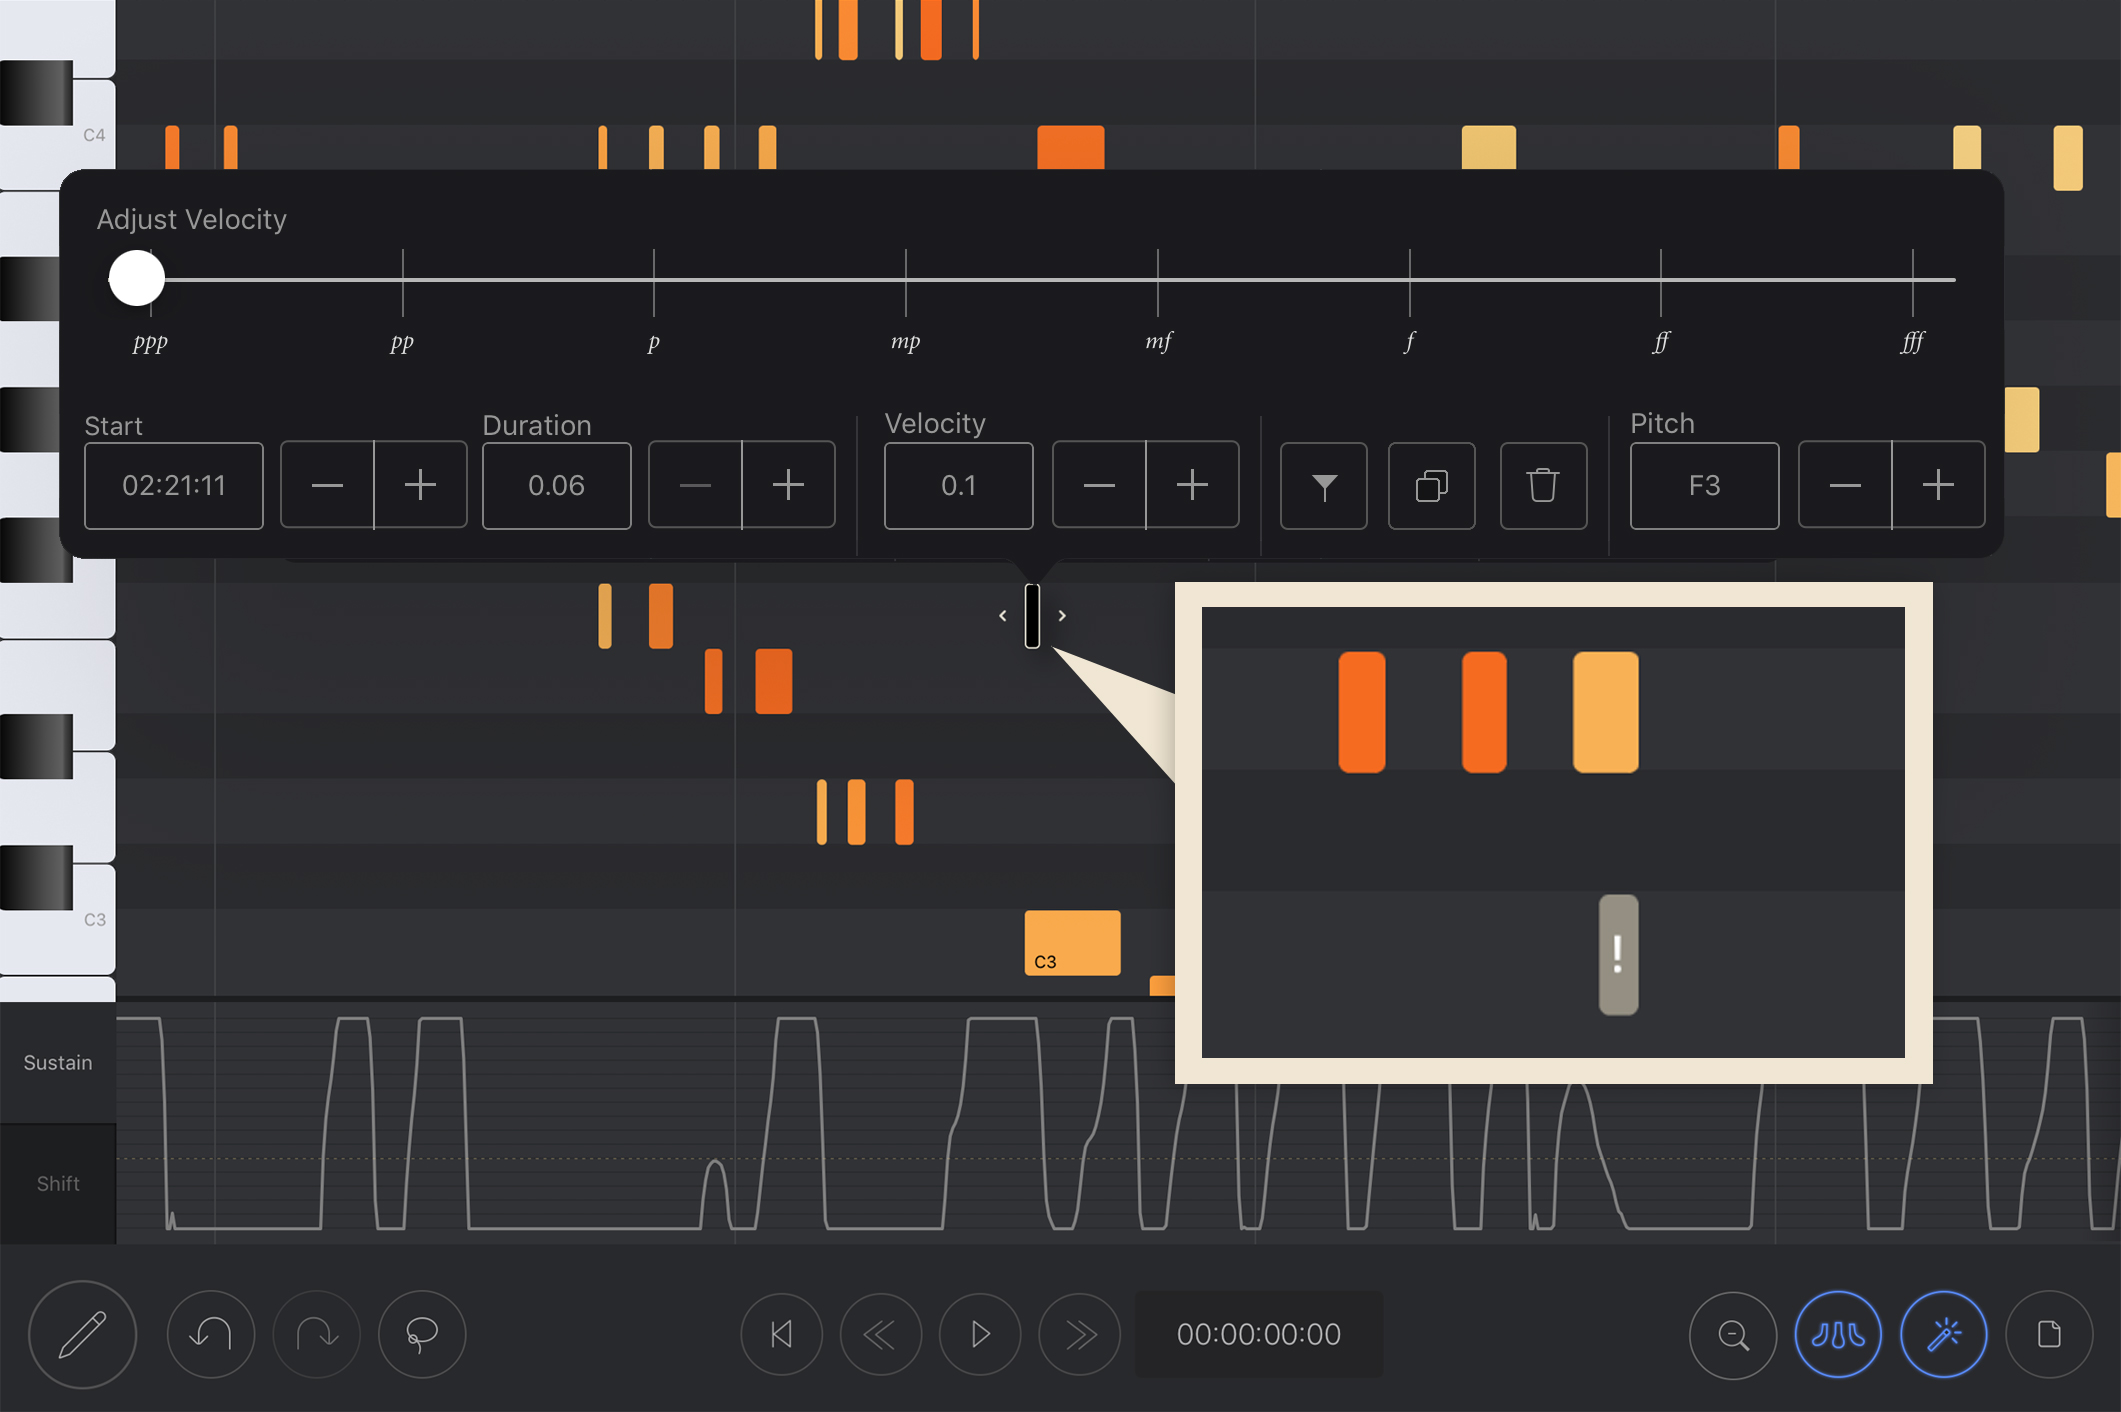
Editing brushed notes:
- Brushed notes will appear with an exclamation point “!”.
- To edit, tap on the note and you will be prompted to increase the note velocity to an audible range using the + button.
- Tap +, and you can then edit or delete the note.